Showing posts with label DIY. Show all posts

Wednesday, August 6, 2014

A New Desk & DIY Art


I am so excited to share my latest find with you...
a new-to-me desk!
I've been on the look-out for one of these for a few years, but only searched Craigslist sporadically
until recently, when I rediscovered my love for shopping for bargains online!
Some people have tremendous success thrifting for items like this,
 but with two busy toddlers to keep occupied, it's much more practical for me to find whatever deals I can from the comfort of my home.

 The previous owner said that the desk was in the family for years,
but it was clearly cared for.
I was so pleased to find that the drawers open easily, and I now have the perfect place to store my crafting supplies, paper and pens.
My actual book work takes place in the office for now, but I'm hoping one day to have my own creative space to work in, and this is a great starting place! :)


Those gorgeous handles and the chippy surface make me swoon,
not to mention the curved legs and the claw feet.
I love it all!


I still can hardly believe I found a desk exactly like I wanted...
and for 50 bucks!!!
{See why I love Craigslist?!}


I wanted art to hang above the desk, and snagged a few clipboards from a stash my husband had in the office.
The "Life is Beautiful" print is a favorite of mine, and was a gift from a friend.
I lettered a verse that I love, and clipped up some feathers with the word "inspire" for the final board.
Super simple, and it cost me next to nothing!
Even better, the artwork can be changed as often as I want!


I added some greenery, along with my vintage typewriter {another Craigslist find!}
and a gorgeous piece of wood from my brother's old barn.
I'm thrilled with my desk,
and love how it creates a new functional area in our home.


What are you favorite bargains? I'd love to hear about them!

Tuesday, June 10, 2014

The Homemade Series: Laundry Soap


There is so much satisfaction in making something from scratch;
whether it's a pie crust or homemade laundry soap!
I get together with a friend to do these projects; somehow, it isn't as daunting
and it's a whole lot of fun!
We tackled homemade shampoo the first time,
and this time, we decided to try making laundry soap. 


We found all the ingredients at Walmart, except the essential oils. Since we were splitting it between the two of us, we made 4 times the amounts shown on the following recipe.

// Homemade Laundry Soap //

3 cups Borax
3 cups washing soda 
(note the box; it looks similar to the baking soda but is labeled differently)
3 cups baking soda
1 bar Fels-Naptha soap
1 bar castile soap
1 1/2 cups Zote soap
30 drops essential oils


My friend did all the shopping [see why I like this?!] and bought some cheap graters to use for grating the soap. This step takes the most time!
But it's good for the biceps, and it makes you feel a little like a pioneer woman. 
The Zote soap came in flakes, which meant less grating. 
Get those if possible; who needs nice biceps?!


[Note to self: Let your toddler photo bomb - messy hair, fake jewelry and all; it makes wonderful memories!]
Mix the dry ingredients together, and then add the shaved soap.
Stir everything together in a large bowl. 
If you want a finer consistency, put it in your food processor or blend it for a little.
Add your essential oils last!


We used a combination of orange and lavender oils. It would be fun to try experimenting 
with different scents! 
30 drops seemed like a lot, because it smelled heavenly with about 20.
But we agreed that it would have been best to use the full amount.
You can't go wrong with essential oils!


Add 2-3 scoops of soap to your laundry, depending on size of load.
I use a baby formula scoop, which is about 1.5 tablespoons.
With a soap that has a scent like this one,
 doing the laundry might become your favorite job after all!

Friday, February 28, 2014

The Home-made Series: Shampoo

I've been intrigued by all the homemade soaps, cleaning products and beauty products 
that people are coming up with as an alternative 
to the chemically-laden options that most stores carry.
There seems to be no lack of recipes; all anyone needs is a little time to dive in!
Winter is my project time.
We can't do much outdoors, so my to-do list becomes quite lengthy.
My friend, Edith & I decided to start making some of those recipes
and I wanted to blog about the results.
Obviously, it's a trial-and-error process, and not everything turns out the way you wish. Ahem.
But, it's still fun trying!
And hopefully, I'm learning some things as I go too.


Our first project was homemade shampoo.
The recipe used castile soap as the main ingredient, with honey, coconut milk and essential oils.

Here are the amounts:
  • 1/2 cup liquid castile soap
  • 1/4 cup canned coconut milk
  • 1/4 cup honey
  • 2 Tbsp. fractionated coconut oil
  • 1 Tbsp. Vitamin E oil
  • 40-50 drops essential oils [we used lavendar & orange]


We didn't find these items in our local stores, although a natural food store would probably have some things.
Vitacost is my favorite place to shop for these ingredients,
and they carried everything but the coconut oil.
That can be purchased on Amazon.


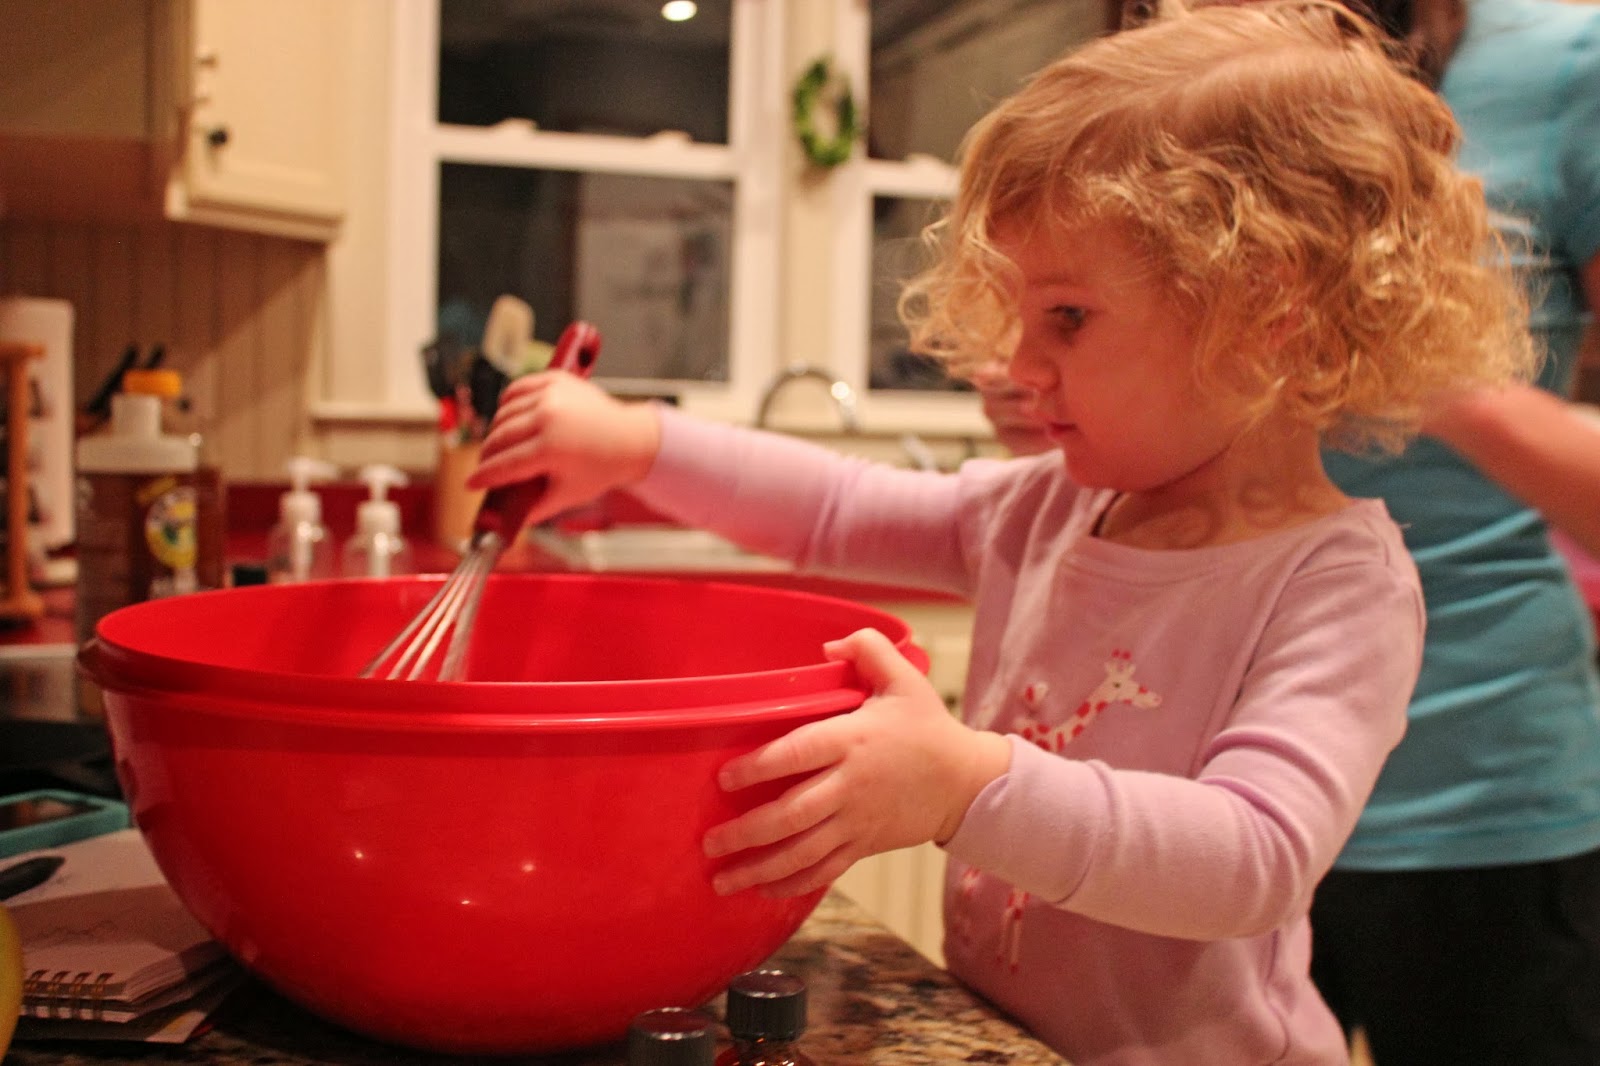
You also need 1 cute little girl with curly hair and a big red bowl.
And a whisk.
Well, you can make it minus the cute little girl, 
but it won't be as...
cute.


Just dump the ingredients in a big bowl and stir,
or put on a lid and shake to combine.
Dispense into bottles and shake before using.


Edith loves this shampoo, and my husband has been very happy with it too!
My hair is more greasy and I wasn't happy with how it cleaned it, 
even though it's supposed to work well for more oily hair.
So...I'm sticking with a really basic routine,
which is to wash my hair with baking soda
and rinse with vinegar.
Works beautifully!

Do you have a favorite home made shampoo?

Thursday, December 12, 2013

Magnolia Wreaths & Mantles


Wreaths are such a fun thing to create, especially at Christmas! I've been seeing all kinds of cool creations all over Blogland this year. And while I love a traditional evergreen wreath, I wanted to try something a bit different. I knew my in-laws had gathered magnolia leaves and sprayed them gold to use for a Thanksgiving tablescape, and thought they would make a beautiful wreath. Before I got my hands on them, another friend used them in her decor for a Christmas banquet! The third time is the charm, they say. I think I'd agree!


I used a straw form for the base, and covered it with strips of burlap I had on hand. 
I didn't realize how much of a mess this could be. When I removed the plastic, the straw went everywhere! It's pretty bad when your two-year-old daughter exclaims about how big a mess you're making! 


Then the fun began! I started to glue leaves around the wreath. I just eyeballed it to try to get the look I wanted. Keep adding leaves until there is no wreath showing. I wanted mine to be full.


Hadassah had a great time pulling the leaves out for me. She never turns down an opportunity to "help"! I just had to keep a close out for the hot glue gun, because she assumed that was fair game too.


More leafy goodness


Meet the Magnolia Wreath!
I'm thrilled with how it turned out!!
[I may or may not have done my share of gazing at it, with a cheesy little grin on my face]
It completes my Christmas mantle, and fits right in with that woodsy-ish feel I was going for.

Vintage Christmas cards and crocheted ornaments make a cute garland. 
The paper trees were last year's Christmas project! You can get the tutorial here.
The ornaments are styrofoam balls that I covered in lace and burlap.
The stamped wood oval is from my shop.


And that's my cozy woodland Christmas mantle!
What are you decorating with this year?
Come back next week to get some Christmas party tablescape inspiration!


I'm linking to


Saturday, December 15, 2012

DIY Polymer Clay Gift Tags


Are we already less than 2 weeks away from Christmas?! Craziness. It always manages to catch me off-guard; there are so many fun things to do and experience that I end up finishing up my Christmas shopping the week before Christmas! I know, some of you manage time much better than I do! :)
It may have something to do with the fact that I get easily distracted; you know, Pinterest projects and such? Speaking of which, I want to share my latest one with you!


I've seen these clay tags all over, in blogs and on Pinterest, and was pleasantly surprised at how easy they actually were to make! You need the polymer clay, which I found at Michael's in a block. I just pulled chunks off of it, and worked it with my fingers until it was pliable and ready to roll.


This is a fun job for little people! Granted, she didn't do alot of rolling but she had fun trying!! :) My goal was to make them about 1/4" thick.


Using a cookie cutter, make your circles. Then I punched a hole in the top with a straw, which worked very well. To add a finishing touch, I took a distressed board and pressed it into the clay to give it a wood grain look. It was a bit clumsy, but it did the trick! I baked them on a cookie sheet at 325 for about 30 min, about 15 minutes longer than the directions said to do them. Just keep an eye on them and make sure they are done before you pull them out.


I now have lots of clay tags to put on all my gifts!!! Ahhh, happy sigh. I love them!


Now I'd better finish that Christmas shopping! :: Happy weekend my friends ::

Friday, December 7, 2012

Vintage Sheet Music Trees


With the vast number of DIY Christmas possibilities on Pinterest,
deciding which project to tackle wasn't the easiest thing in the world.
{I know, I have a difficult life.}
Christmas trees hold a special place in my heart,
and I love all variations as decor.
Add to that the fact that I had lots of vintage sheet music on hand,
and I was sold!
 
Shall we get started?
Here's the supply list:
 
:: foam cones, in varying sizes
:: vintage sheet music
:: scissors
:: hot glue gun
:: paper cutter, if you have one
 
 
1. Cut 1.5" wide strips from your sheet music.
 
 
2. For the length of the strip, make cuts that are about 1" long, spacing them approximately 1/4" apart.
 
 
3. After all the cuts are made, roll the strip of paper into a cylinder. My paper was truly vintage and a little brittle, so this step wasn't easy! But it is important to get the paper to curl. After that is done, gently unwrap the strip and run a line of glue on the base of the cone.
 
 
4. Glue the strip around the perimeter of the tree and gently separate the fringes.
Continue gluing the strips of paper to the tree, moving towards the top. There shouldn't be much of a space between the strips of paper, unless of course, you want to see the white of the cone peeking through! {Ask me how I know}
 
 
Note: This project is a great one to do while the baby is napping and you can watch your favorite show on TV! :)
 
 
Now my next "big" decision is where to display these baby trees!
 
What's your latest Christmas project? I'd love to hear about it!!


Saturday, November 24, 2012

Thanksgiving Week 3: DIY Placemats & Napkin Holders


Thanksgiving.
What sights, sounds & memories does that word evoke in you?
For me, it's the whole package.
It's a time of spiritual reflection and worship, 
as I consider all the bounty God has blessed me with.
It's a relational experience,
as family & friends gather to share food and memories of the past.
And it's definitely a physical experience:
the smells, the taste & the eye candy!


As I prepared the decorations,
I wanted them to reflect all of those things:
Faith + Family + Food.
How much better can it get??!!


Pinterest was my source of inspiration, as usual! :)
I found the idea for these placemats, and although they took a bit of time, they weren't difficult to make.
I used a roll of brown wrapping paper I had on hand, and cut it in half the length of the paper.
Then I guestimated (my typical!) for the actual size I wanted them to be.
I adhered some lace to both edges to dress them up a bit.
Then I bought a white paint marker and wrote "Give thanks" on the one end.
The original source suggested writing "I am thankful for" and then adding lines below that for each person to write their own list. 
What a cute idea!


For the napkin holders, I used some burlap & twine I had on hand
and wrapped it around some basic white napkins,
which I also had on hand.
It's all about using what you got, right?


I used some reclaimed barn wood to display my table setting.
I am in love with old farmhouse tables, but since I won't be needing another dining room table anytime soon, I'll just be content with touches of old wood
in my decor!
I found the branches when Hadassah & I were on a run one morning,
and thought they would be the perfect touch 
with my upcyled vintage jars.
I love the look of tapers, so those completed a simple, yet rustic tablescape.


Today, I get to enjoy round 2 of Thanksgiving,
this time with my family!
I hope your celebration was a beautiful one,
and another reminder of all the gifts we've been given.
Happy weekend, friends!


Tuesday, October 9, 2012

Perennial Favorites Barn Sale Recap

There was excitement in the air, as the sun peeked over the horizon on a chilly September morning.

 
The Roller Mill barn was a flurry of activity, as vendors set up their displays, chatted and sipped coffee. A riot of color exploded in groupings of mums and pumpkins, and a general autumn vibe exuded from the atmosphere.
 
 
There were about 9 different vendors that displayed their goodies this year! I failed to get pictures with the lovely ladies themselves, so I'll try to mention who's who.


Sweet hair accessories from Amelia Bedelia Designs! 


Gorgeous handmade pillows by Heidi, "The Vintage Lantern"


Beautiful fall arrangements, Christmas wreaths & caramel apples from Hopeful Designs!
 
 
 Luisa Morgan created one-of-a-kind handmade journals and fun notecards!


Audrey from Tender Fashions made sweet bonnets, bibs and ruffled baby dresses!
 
Christy was the burlap queen, with a range of burlap products, including wreaths, silverware holders, pillows and banners! For some reason, I don't have pictures of her items, even though she had a table right beside me! :(
 
Alla featured cute knitted baby hats, in a variety of sizes. {I bought a white one for Hadassah, and LOVE it!} Sorry, no pictures!


I featured a variety of hand-painted barn wood signs and canvases, as well as a handwritten wedding invitation {my newest line!}
 
 
Melody had colorful monograms and fun hair flower accessories, as well as gorgeous handmade jewelry that a friend fashioned for the sale!


Amy {aka: Mrs Brown} at Roller Mill Farms, had a variety of goodies for sale, including some delicious apple butter, vintage feed sacks and amazing homemade soap!
 
A photo booth, delicious homemade doughnuts and apple fritters, made by Sheila at Candid Cooking & Karana, as well as pork bbq by the Showalter brothers, and pumpkin painting made the day fun-filled and memorable!
 
 
It was an honor to work with these ladies, and watch a dream become a reality! Amelia & Amy, you inspire me. Here's to the future of Perennial Favorites Barn Sales!!!
 
 
 I want to extend a heart-felt thank you to each of  you who participated, either as vendors, or as "gofers" or customers. You all made this event possible! 
Mark your calendars for the 2013 Barn Sale! We hope to see you there!!!