Showing posts with label Yummy Eats. Show all posts

Tuesday, September 23, 2014

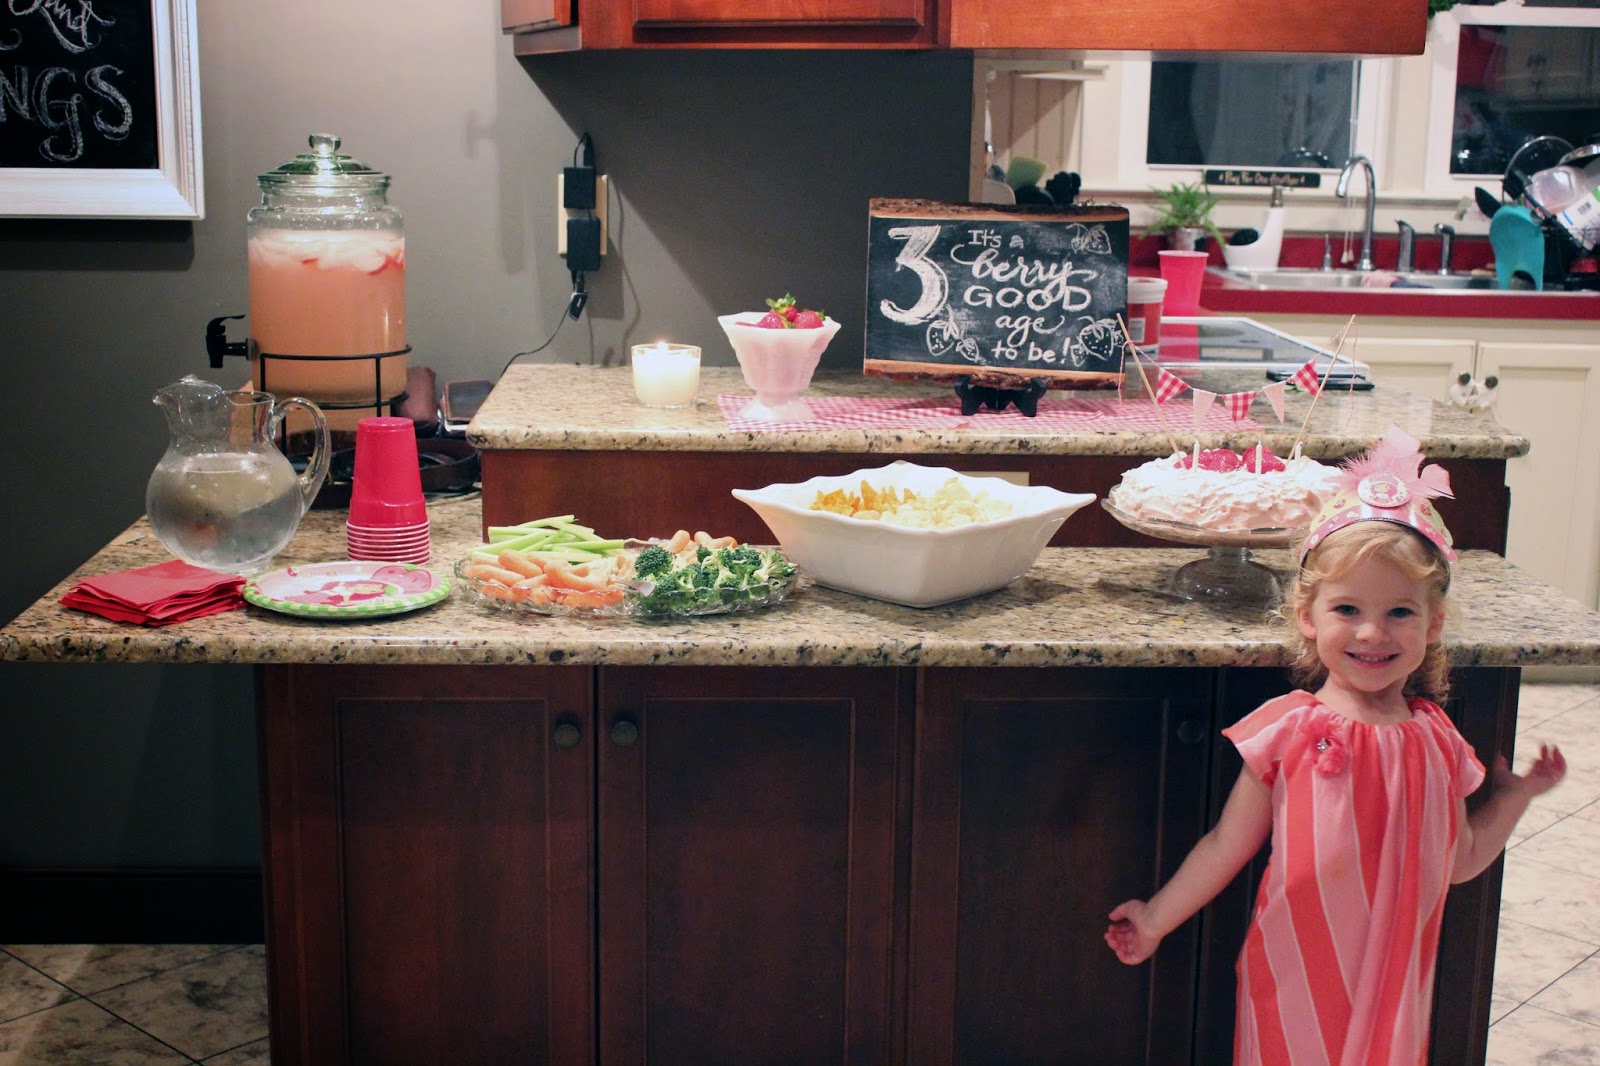
Hadassah turns 3!

She's a singer and loves to dance;
a people-person and an artist.


She has a vivid imagination and loves to help.
Chore charts are the coolest things, since you can get a sticker for doing jobs!
She's also become one of Mommy's favorite shopping buddies!
And yes, that could become a problem :)


She just turned three, and believes that she is all grown-up!
Apparently, she hasn't quite made it there yet since Strawberry Shortcake is one of her favorite shows.
Since she loves it so much, that became the theme of her birthday party!


I decided to just buy the plates, along with a birthday tiara, which she proudly wore!
I asked her if she wanted to help mix up the cake,
and she said, "It would be my pleasure!" 
She makes me smile.


I had found a recipe for strawberry milkshake poke cake, so that's what we made.
It used a box cake mix, so it took a minimum amount of effort to whip up,
and it got rave reviews!
I even had an excuse to make some bunting as a topper :)


She loved her cake, and that made my Mama heart happy!

Isn't this the most adorable umbrella ever?!
With the most adorable little girl ever?!
Yes, I'm biased.


Her gift from us was a bicycle!
She was thrilled.
All evening long, she rode around and around the house.
How is she this big already?!


She's a ray of sunshine and brings so much joy to our lives.
Happy birthday, Hadassah Jo!

Monday, March 17, 2014

Of Snow Days & Apple Fritters

 Some things just go together...
like peanut butter and chocolate,
sunshine and flip flops,
and apple fritters and snow days.


When I saw the weather forecast,
I wasn't exactly thrilled at the thought of yet another snowstorm!
But then I realized that spring is just around the corner,
so why not just enjoy the weather I'm given?


There's something about the snow flying that makes me want to get in my comfiest clothes (namely pj's)
put in a good movie and snack on some yummy food.
Sunday night was the perfect time to do that!
I didn't complain about having some extra time with my man,
since he'd been gone to Indiana for a conference for the previous 3 days.


After the storm had ended, I bundled up the kiddos and we trudged through the snow to the mailbox.
The snow was deep enough that Hadassah could barely walk through the drifts,
but she still insisted on doing it herself!


Since my strategic plan to slip out the door while the baby slept didn't work the way I'd hoped,
I resorted to holding the baby in one arm
while snapping pictures with the other.


She happily hopped in her car, but didn't make it very far.
Someone really ought to make toy snowplows;
just think how much fun they'd have and we wouldn't have to shovel the walks!


After putting the kids to bed, I happened to open my Bible to Job 38, and thought it was the perfect passage to read after seeing the blanket of snow.
"Have you entered the storehouses of the snow? (v22)
Who fathers the drops of dew? From whose womb comes the ice?" (v28, 29)


I'm in awe of the power of God!
All of creation speaks of His glory.


Now, about those apple fritters....
I always think of doughnuts on snow days, but don't really want to make a whole batch for us to eat.
I looked on Pinterest and found a recipe for apple fritter bites.
It was a small batch, so it was perfect for us!


Ingredients:
1 1/4 cup flour
1/3 cup sugar
1 teaspoon baking powder
1 teaspoon cinnamon
1/4 teaspoon salt
1/3 cup milk
1 egg
1 tablespoon butter, melted
1/2 teaspoon vanilla
1 1/2 cup chopped apple, (can use granny smith, gala, and rome apples) pea size
1 cup powered sugar
3 tablespoons milk or half and half
oil for frying
Directions: 
In a medium bowl, mix flour, sugar, baking powder, cinnamon, and salt; set aside. In a small bowl, stir together milk, egg, vanilla, and butter until egg is mixed well. Pour into dry ingredient and just stir until all ingredient are mixed; add apples and fold in gently. Heat oil around 365 degrees and drop in oil with a small cookie scooper being careful not to over crowd. Once in the grease bubbles, turn fritters over and flatten a little and fry until golden brown. It takes about 35 seconds on each side on this size. Adjust cooking time on size of the fritter and the temperature of the oil.

In a small bowl, mix together powdered sugar and milk until smooth and creamy; set aside.  When golden brown, remove the fritters from the hot oil and lay on a sheet pan lined with paper towels.  When slightly cooled, dip in the glaze and place on a wire rack over a sheet pan to let the excess drip off.  Eat warm.  Enjoy!


I used my Fry Daddy, and turned it on before I had the batter mixed up so the oil was hotter than it probably should have been, so they ended up being a little darker than I'd planned.


But it didn't seem to matter after I'd rolled them in glaze.
Oh. My. Total deliciousness!
These are a treat for sure.


Let's just say, I made my husband's night!
And mine :)
I believe we have ourselves a new snow-day tradition!


Throw in a bowl of French onion soup,
and I'm in heaven!


Somebody, remind me again why I don't like snow days!

Thursday, August 8, 2013

Peach-Apricot Jam

With a newborn baby in the house, and no garden planted [aka: no weeds to pull...yay!], I didn't have high aspirations for canning this year. But since I have a kind MIL who has a great canning setup [and the help to go along with it!], my freezer is stocked with sweet corn and the shelves are full of beans, salsa and pizza sauce.
Canning, in itself, has never been my job of choice. I distinctly recall making loud statements about how I would never do canning when I grew up! My wise mother calmly responded that I didn't need to when I had my own home. Of course, that all changed when it was my home and responsibility!
Even though I don't always love the process, I appreciate the results and hope to one day teach my daughter to do it as well. I can only hope she is smarter than I was!
When I had an abundance of ripe peaches to use last week, I decided to try making some peach jam. Peaches are one of my favorite fruits and this jam didn't disappoint! The apricot flavor complimented the peaches beautifully and the recipe was easy to prepare.


Peach-Apricot Jam

6 cups crushed peaches
6 cups sugar
2 cups crushed pineapple

Combine in saucepan and cook 20 minutes.

1 (3 oz) pkg apricot jello
1 (1 3/4 oz) pkg Sure Jell

Add, and cook 2 minutes, Pour into jars and seal.


Now I need to make some homemade bread to put the jam on...yummy! What's your favorite jam?

Saturday, March 30, 2013

Celebrating Easter

Easter is a beautiful time, when the glory of spring is beginning to transform a dreary world. 
It's a victorious time, when we rejoice in the glory of a risen Saviour!
Easter is so worth celebrating!!!


 Since I'm hosting a family dinner tomorrow, I wanted to create a tablescape that would have elements of new life {or at least something green!} in it.


I discovered these adorable little clay pots at Dollar Tree and just couldn't leave them there!! 
After covering them with a coat of paint, I potted a succulent in each of them. Then I decided to add some interest with gold numbers.


A neighbor let me pick some daffodils from her flowerbed. 
Is there anything more lovely than fresh-cut flowers??!!
The vibrant yellow color makes me so happy :)


I think I'll give some of the potted succulents as favors...
if I can manage to part with them! 


The table is set and ready for guests.
A raspberry white chocolate pound cake is tempting me on the counter.


And I am so ready to go to church and worship the King Who died in my place. 
It's completely humbling to realize it was MY sin that put Him there,
but so thrilling to realize we are victorious because He defeated sin on the cross!!
Yes, Easter is worth celebrating
because HE LIVES!!!

Wednesday, February 13, 2013

A Brunch for my Valentine

You know, we don't need Valentine's Day to celebrate the people we love the most.
But it helps me to be intentional about doing just that!
I like to have a special meal for my man,
although it's easy to miss it in the whirl of planning our youth's annual Sweet Sundae Shoppe.
So when I found some strawberries on sale,
I knew just what I would do with them!


I present to you:
Strawberry Nutella French Toast!!!
It was heavenly.
But then, I'm a little obsessed with anything Nutella, and adding strawberries just takes this over the top!

This is the French Toast recipe I used:
6 slices cinnamon raisin bread
2 eggs
1/3 cup milk
cinnamon
1 tsp vanilla

Whisk together eggs, milk, vanilla & cinnamon, dip bread in mixture and fry in butter until golden.
Cut bread into a heart shape, slather on some Nutella {make sure you're generous!} add the strawberries, and top with the second slice of bread. Sprinkle with confectioner's sugar.
Enjoy with the ones you love!


Just looking at this makes me hungry! 
I think it's time to buy some more strawberries....
What's your favorite Valentine's brunch/dinner?

Much love to each of you!

Wednesday, January 23, 2013

Easy Homemade Yogurt

Homemade yogurt was on my list of projects to do for quite a while, 
and I was amazed at how easy it really was to make,
not to mention a whole lot cheaper and healthier than what you buy in the store!


Since a few of you had requested this recipe, I decided it would be easier to blog about it than to try to post it on Facebook!
The recipe comes from the A+ Cookbook - a new favorite of mine - and originates with Laura Showalter. 

The ingredients:
1 gallon milk
2 1/2 T unflavored gelatin
1/2 cup plain yogurt
1 cup sweetener (sugar, honey or other)


Cooking Instructions:
Heat milk in large kettle to 180 degrees. Remove from heat, let cool to 120 degrees. 
Meanwhile, soak gelatin in 1/2 cup cold water. When milk reaches 120 degrees, stir in gelatin, yogurt and sweetener. (May also add powdered acidolphilus.) Beat well. Pour into glass jars. (I prefer wide-mouth quarts.) Incubate by one of the following methods: 
1) Place in a large lunch box cooler or large thermos, fill to neck of jars with hot water, and leave 6 to 8 hours.
2) Or set jars in oven on pilot or with oven light on (temperature should be approximately 110-120 degrees); leave 6-8 hours.
Refrigerate 12 hours before eating.


My Notes:
I didn't have quite the full gallon of milk that the recipe called for, so the yogurt was more the consistency of a gelatin. I think I'll try using a little less gelatin the next time I make it (and obviously, more milk!) 
I also used honey as a sweetener and thought the flavor was delicious.
We all loved it, especially Hadassah!!
A favorite of mine is eating it with fresh fruit & homemade granola!

And there you have it...your own homemade yogurt!
Let me know if you like it :)

Tuesday, June 12, 2012

The Cake Ball Conquest


I've heard so many drool-worthy reviews about these cake babies, 
but have had no luck at getting an invitation to a wedding where they were served. 
{I know, I've been cheated}
After I scheduled a spa party with my friend Andrea, 
I was thinking about food I wanted to serve and the words "cake balls" did a chant in my brain.
You know how necessary it is to make fun little appetizers that nobody else in your neighborhood has made before! haha
So I decided to take the proverbial bull by the horns, and just make some!
In case you are wondering, 
I am no Rachael Ray, nor shall I ever be. 
If I can make them, you have no excuse not to try!!!


Here's a step-by-step of the process I used in case you're interested! 

I made a cake, from scratch, and while it was cooling, I mixed up a half batch of icing. 
The recipes I looked at called for box cake mixes and bought tubs of icing.
You can use that, if you keep them on hand.
Since I didn't have them {and am such a do-it-from-scratch Mennonite at times!}
I made them myself. 
My SIL, Polly, just happened to stop in at the house while this was in progress, 
so I called on her expertise to crumble the cake, mix in the icing and shape it into balls.
She used a cookie scoop, which made them all uniform in size.
She's smart like that!
I melted some white chocolate wafers and we dipped the one end
of the stick into the melted chocolate and pushed it into the cake balls.
The hardened chocolate helps hold the stick in place.


Next, place the cake balls in the freezer until firm.
This is important!
We tried to dip some before they were frozen, and they just wanted to fall apart. 
It was a dream to coat them when they were solid!
I just rolled them from side to side, until the surface was covered.
Then I allowed the excess chocolate to run off before placing them in a strainer,
where they hardened.


I added some food coloring {gasp!} to the leftover chocolate
and drizzled that on the top.
I'd love to get more creative with this, if I ever make these again,
and maybe write initials or draw flowers.
It was so fun to add the finishing touches on them!


I found my stash of old white apothecary jars, and clustered the cake balls in them.
Then I smiled.
And snapped pictures.
I was so happy with the results!!!
I ended up with at least 35 cake balls, using a regular cake recipe.
Seriously, make them.
They are soooo deliciously moist and just fun to eat!


I also made cucumber cups, filled with chicken salad.
Yummo!
My husband loved how refreshing they were. 
{He sampled the food even though he wasn't participating in the spa!}
To make these, you just cut wedges of cucumber, and hollow out the insides with a melon scoop.
Fill with your favorite salad and sprinkle a little dill on the top.
Voila!


A party is complete with a cheese ball, right? 
I think so!

So now I want to know, what are your favorite party foods? 

Saturday, May 5, 2012

Cupcake Craze

There are cupcakes.
And then, there are cupcakes...
 ...the kind that burst with flavor and creamy goodness! 
The kind that The Cupcake Company makes. 


My friend, who is crazy about them, 
introduced me to this home-based business in McGaheysville. 
Similar to the old-fashioned ice cream trucks, 
they frequently park a "cupcake truck" at various places, 
where I made my first purchase.
I am officially addicted!
On the left is banana cream and the right is berry lemonade.


Nutty buddy and orange dreamsicle are pictured above.
Sometimes looks are deceiving [ie: McDonald's commercials]
but these, my friends, taste better than they look!!!
Hey, if you don't believe me...
try them yourself!


Chocolate with peanut butter icing??
Help me!!!
It's good I ate half before sharing it with my husband,
or I wouldn't have gotten a chance to even try it!


Here's a picture my friend sent me:
an order she placed for a dozen of 4 different flavors. 
I want one of each, please!!
If you go here to their website, you can find a phone number to place your order.
Or stop by Home Depot next Saturday and visit the Cupcake Truck.
I promise you, 
you won't be disappointed!!

Enjoy a moment of sweetness this weekend, my friends!

Saturday, April 14, 2012

Doughnuts by the Dozen!


As part of a fundraiser for our upcoming youth trip, we decided to make some homemade doughnuts. Seriously, who can resist them? 
Not me!


They used some handy dandy cutters, which made the process go much more quickly.


These two ladies were pro's and there's no way we could have done it without 'em!!
I have no experience in the doughnut-making industry, but am excited about giving it a try now!


Don't ask how much lard we used... it ruins the doughnut-eating experience!


Carol glazed more doughnuts than she'd probably care to count.
We coated some of them in cinnamon and sugar.
Yummm!!


 At the end of the evening, we had 60 dozen fresh homemade doughnuts! Yes, 60!!!
And they were amazing.
I know that I ought to confess how many I ate, but let's just say that there's a reason I didn't jump on the scales this morning!
Unfortunately, there's still a few left in the box...and they're calling my name.

Enjoy your weekend, friends!!